Sweet small purse, tutorial in English:
og for å få fine hjørner følger du linken HIT)
Helga Design, 2008.

This is the presser foot I use when I'm sewing
Helga Design, 2008.

This is the presser foot I use when I'm sewing
the zipper unto the
purse.
Phaff nr 3 or the
Bernina nr 5.
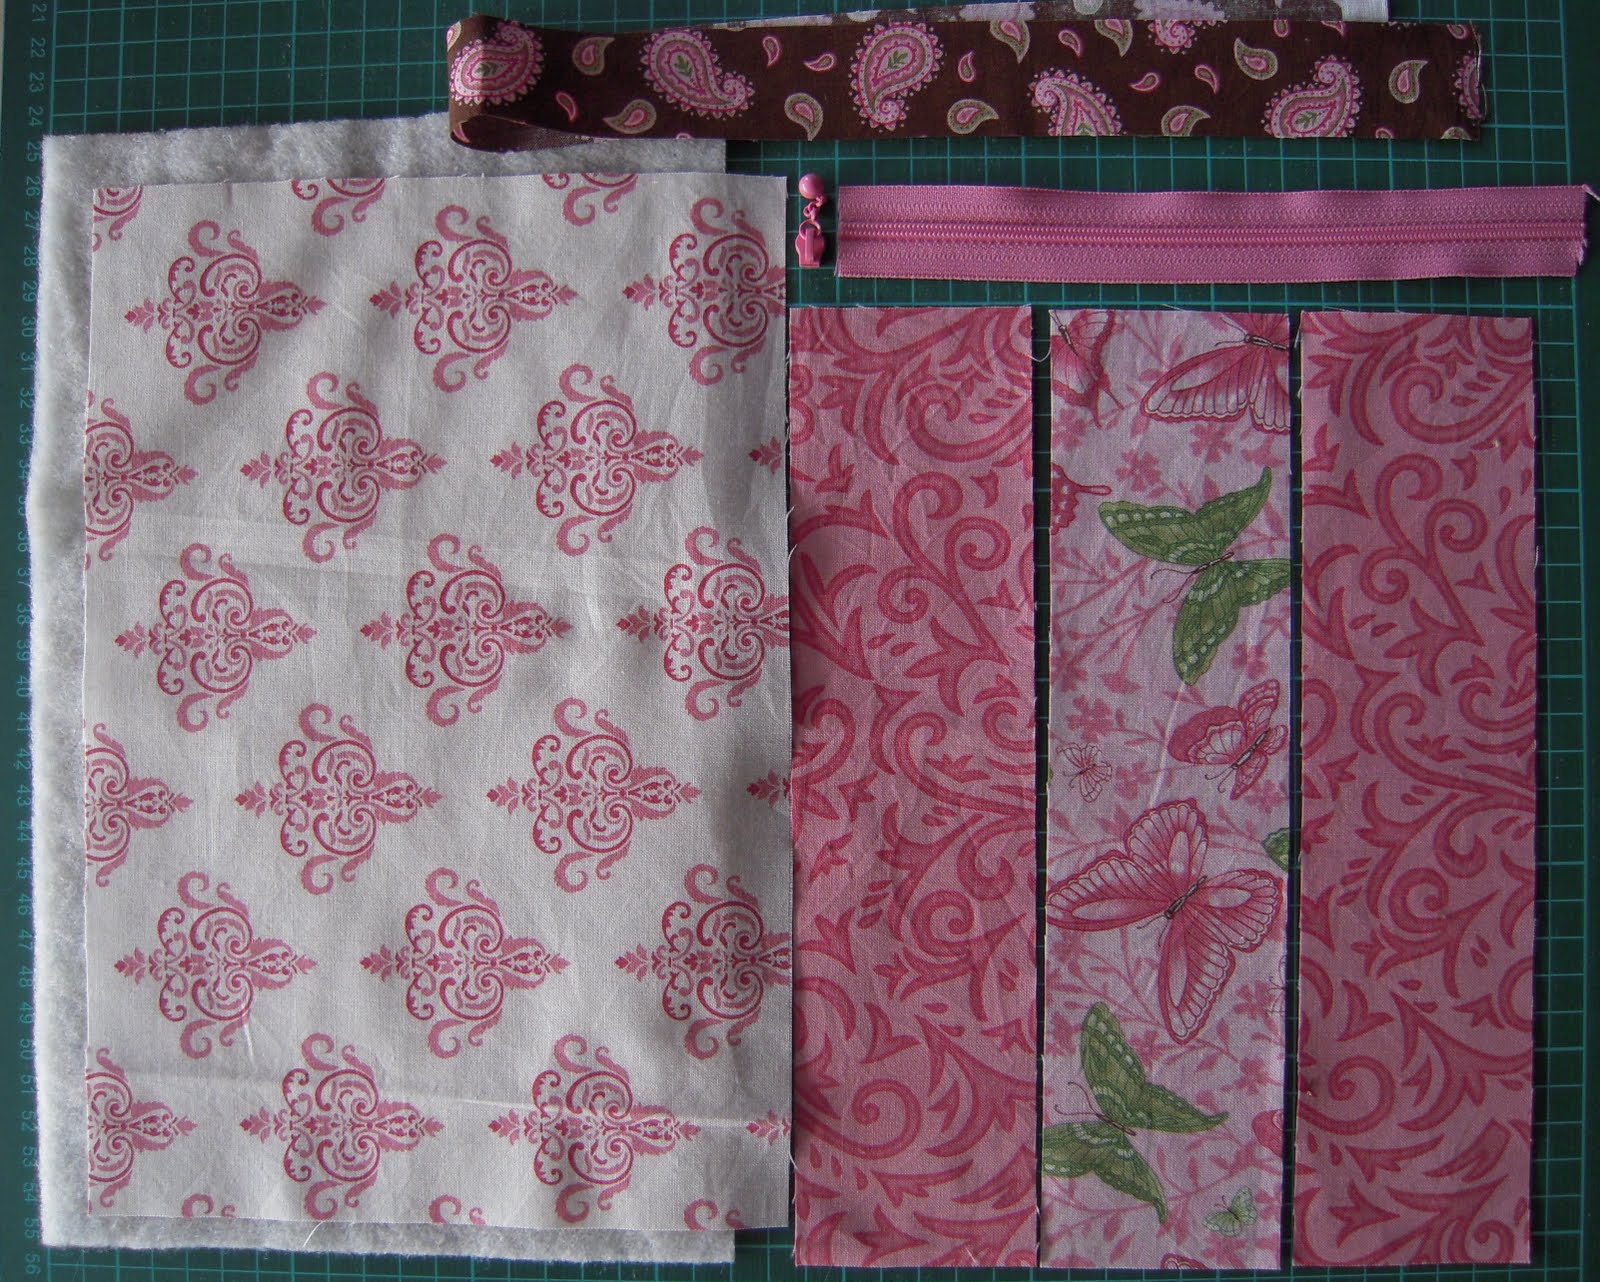
 Materials:
3 2,5 x 10 inch
strips for the front.
1 7,5 x 11 inch
Backing
1 7,5 x 11 inch
Batting
2 1 1/4 x 7,5
inch strips for Binding
1 7,5 inch
Zipper
Sew together the
three strips.
Make a sandwich
and
quilt as you desire.

Use a plate as a template to cut a nice curve at both side
and trim.

At both sides, sew the binding with your needle
position
as long as possible to the left.

Press the binding down, like this........

Change the presser foot, this is the nr. 5 -
Bernina.
And sew the zipper on at both sides,
(the zipper should be split).
(the zipper should be split).

Remember to move your needle position.

Cut of the binding behind the Zipper (on both sides)

Make a second seam at the binding......

...... make sure that the second seam meet the
zipper
at the "wrong" side :o)

You can now close the zipper.

Sew the sides togheter, first the 1/4 seam
allowance
and then zic zac edge like this:

Now its time to
make Box corner......
Remember to count in the seam allowance.

......and cut.......

Sew an 1/4 inch seam allowance and zic zac edge
like this:

And......... Vola!!

Here are some ideas...


Lena Karen :o)
Oj,oj så fina nessar du sytt,,och tack för din beskrivning!!!Kram
SvarSlettHei Lena. Så fin tutorial. Jeg har hele tiden trodd at disse var mye større. Men disse skal jeg prøve. Supert for jellyroll-remser.
SvarSlettLikte pungene i forrige innlegg kjempegodt.
Ha en fin helg :-) Klem fra kalde Vikna :-)
Så mange fine!
SvarSlettGod lørdag :O)
Så många fina nessar Du sytt och tack för beskrivningen.
SvarSlettkram
Sminkspungene dine er så fine! Takk for beskrivelsen.
SvarSlettÅh, tusen tack för super fint mönster på dina underbara nessar! Det är ju ett perfekt mönster för scraps också!
SvarSlettKramisar
Your tutorial is WONDERFUL! I received one of these little bags as a gift last year, and it is nice to use to put a small project in - either a stitchery project or a hexagon project.
SvarSlettTakk for en flott forklaring, så mange fine punger du har laget
SvarSlettMycket söta necessärer du har sytt och tack för bildserien du har gjort, går lätt att följa!
SvarSlettFabulous tutorial! Such a great little purse that can be used for so many things! Thank you for sharing the tutorial.
SvarSlettwhat a great little bag..thank you for sharing! I am sure to make a few of these for Christmas gifts!!
SvarSlettWhat lovely bags, I'd love to make some! Two questions: what is the seam size when you first sew the binding on? and where do you find such cute zippers with the little ball pull on them? They are adorable!
SvarSlettYou have been quicker then me :) Wanted to thank you for a really clear instructions. I've made one purse already, just covered inside seams like you do at purses in your shop. Love your blog and will follow it further.
SvarSlettHugs, Sonja
Gjett om jeg skal prøve å sy meg noen slike da! De er jo bare så søte!
SvarSlettThanks Lena,
SvarSlettI really got to try this tutorial, love these purses.
Så inspirerende og flott at du legger ut fremgangsmåte og ideer til hvordan vi kan sy. Legg gjerne ut flere mønstre :)
SvarSlettVery cute bags! I am new to sewing- I don't understand what to do after cutting out the square shapes on both sides?
SvarSlettThank you for a very understandable tutorial. Simple and clear. And your bag designs are very creative. Thanks again!
SvarSlettTricia from USA
Denne kommentaren har blitt fjernet av forfatteren.
SvarSlett